ちょっとWebアプリの確認をしたいので・・
Codepenいじったり、codeanywhereで遊んだりしていたのですが、
Webアプリで、地図(leafret.js で Openstreetmap)を使い、画像(Frickrの1Tの容量)に入れて、認証はPHP Sentinelを使ってやろうと。。したら。。いよいよAPI認証が複雑なやつは、無料環境ではやりにくく。。
さくらスタンダードを借りているんで、そこで直接いろいろPHPやらPythonやら動かして、ちょっとごにょごにょしていたんですが、APIなどの認証用のトークンとかもろみえになるのと、Python動かす分にはCGIとしてしか動かない設定なのでいいのですがPHPは外部から叩かれると動いちゃうので・・・やっぱりローカル環境で試さなきゃなぁ~と。。
それで、Vagrantで、Virtualboxでの仮想化をWindows10に入れてみたことの忘備録です。
さくらスタンダードの環境調査
どうせあとで、サーバで動かすので、同じ環境に近いようにしとかなくっちゃ駄目でしょうから環境をおさらい
| OS・Middle | バージョン |
|---|---|
| FreeBSD | 9.1-RELEASE-p24 amd64 |
| Apache | 2.4.33 |
| MySQL | 5.5 |
| コマンド名 | コマンドパス | バージョン |
|---|---|---|
| Perl | /usr/bin/perl | 5.14.4 |
| PHP | /usr/local/bin/php | 7.1.14 |
| Ruby | /usr/local/bin/ruby | 1.8.7 |
| Python | /usr/local/bin/python | 2.7.6 |
| nkf | /usr/local/bin/nkf | 2.1.2 |
| uuencode | /usr/bin/uuencode | |
| uudecode | /usr/bin/uudecode | |
| sendmail | /usr/sbin/sendmail | 8.14.5 |
| gzip | /usr/bin/gzip | |
| zip | /usr/local/bin/zip | 3.0 |
| unzip | /usr/local/bin/unzip | 6.00 |
| gcc | /usr/bin/gcc | 4.2.1 |
| convert | /usr/local/bin/convert | 6.8.0-7 |
| gs | /usr/local/bin/gs | 8.71 |
| curl | /usr/local/bin/curl | 7.47.0 |
| lynx | /usr/local/bin/lynx | 2.8.8dev.3 |
| elvis | /usr/local/bin/elvis | 1.8pl4+j1.1 |
これ以外に、Python 3.6、composer が入っていたりいろいろやっちゃってますが。。
こんな環境。。
Virtualboxで、FreeBSD入れればいいのね。
なんとなく。。いろいろ作りそうな気がするので(昔はVMwareでやった時もいろいろ作っていたのよね)。。Vagrantで、簡単に変えれるようにしとこうかな?っと。
Vagrantと、Virtualboxをインストールして。。再起動
VagrantのBoxファイルをここから探してみると、freebsd-9.1-amd64というものがあったので、そいつを入れることにする。
>vagrant init ptomulik/freebsd-9.1-amd64 \とすると、Vagrantfileが作られる。見てみると。。赤字のところのコメントを外しておいた方が、あとで使う時には良さそう。(サーバーとして使うので、IPを固定にしておくのと、Apatch2をインストールしてしまう。
# -*- mode: ruby -*-
# vi: set ft=ruby :

# All Vagrant configuration is done below. The "2" in Vagrant.configure
# configures the configuration version (we support older styles for
# backwards compatibility). Please don't change it unless you know what
# you're doing.
Vagrant.configure("2") do |config|
 # The most common configuration options are documented and commented below.
 # For a complete reference, please see the online documentation at
 # https://docs.vagrantup.com.

# Every Vagrant development environment requires a box. You can search for
 # boxes at https://vagrantcloud.com/search.
 config.vm.box = "ptomulik/freebsd-9.1-amd64"

# The url from where the 'config.vm.box' box will be fetched if it
 # doesn't already exist on the user's system.
 config.vm.box_url = "\"

# Create a forwarded port mapping which allows access to a specific port
 # within the machine from a port on the host machine. In the example below,
 # accessing "localhost:8080" will access port 80 on the guest machine.
 # NOTE: This will enable public access to the opened port
 # config.vm.network "forwarded_port", guest: 80, host: 8080

# Create a forwarded port mapping which allows access to a specific port
 # within the machine from a port on the host machine and only allow access
 # via 127.0.0.1 to disable public access
 # config.vm.network "forwarded_port", guest: 80, host: 8080, host_ip: "127.0.0.1"

# Create a private network, which allows host-only access to the machine
 # using a specific IP.
 # config.vm.network "private_network", ip: "192.168.33.10"

# Create a public network, which generally matched to bridged network.
 # Bridged networks make the machine appear as another physical device on
 # your network.
 # config.vm.network "public_network"

# Share an additional folder to the guest VM. The first argument is
 # the path on the host to the actual folder. The second argument is
 # the path on the guest to mount the folder. And the optional third
 # argument is a set of non-required options.
 # config.vm.synced_folder "../data", "/vagrant_data"

# Provider-specific configuration so you can fine-tune various
 # backing providers for Vagrant. These expose provider-specific options.
 # Example for VirtualBox:
 #
 # config.vm.provider "virtualbox" do |vb|
 # # Display the VirtualBox GUI when booting the machine
 # vb.gui = true
 #
 # # Customize the amount of memory on the VM:
 # vb.memory = "1024"
 # end
 #
 # View the documentation for the provider you are using for more
 # information on available options.

# Enable provisioning with a shell script. Additional provisioners such as
 # Puppet, Chef, Ansible, Salt, and Docker are also available. Please see the
 # documentation for more information about their specific syntax and use.
 # config.vm.provision "shell", inline: <<-SHELL
 # apt-get update
 # apt-get install -y apache2
 # SHELL
end
TeraPadで編集しておいて
vagrant up
してみると
There is a syntax error in the following Vagrantfile. The syntax error
message is reproduced below for convenience:

C:/Users/tom2r/vagrant/freebsd9/Vagrantfile:23: syntax error, unexpected tIDENTIFIER, expecting keyword_end
  # accessing "localhost:8080" will access port 80 on
                        ^
と出てきます。
調べてみると。。Tabかスペースが入ってしまっているとのこと。。

といろいろやったが迷宮入り(笑)で。。
vagrant init ptomulik/freebsd-9.1-amd64 --box-version 1.2.0
として作り直したら。。行った(笑)
Vagrant up!
>vagrant up
Bringing machine 'default' up with 'virtualbox' provider...
==> default: Importing base box 'ptomulik/freebsd-9.1-amd64'...
==> default: Matching MAC address for NAT networking...
==> default: Checking if box 'ptomulik/freebsd-9.1-amd64' is up to date...
==> default: Setting the name of the VM: freebsd9_default_1523636639147_5974
==> default: Clearing any previously set network interfaces...
==> default: Preparing network interfaces based on configuration...
 default: Adapter 1: nat
 default: Adapter 2: hostonly
==> default: Forwarding ports...
 default: 22 (guest) => 2222 (host) (adapter 1)
==> default: Booting VM...
==> default: Waiting for machine to boot. This may take a few minutes...
 default: SSH address: 127.0.0.1:2222
 default: SSH username: vagrant
 default: SSH auth method: private key
 default:
 default: Vagrant insecure key detected. Vagrant will automatically replace
 default: this with a newly generated keypair for better security.
 default:
 default: Inserting generated public key within guest...
 default: Removing insecure key from the guest if it's present...
 default: Key inserted! Disconnecting and reconnecting using new SSH key...
==> default: Machine booted and ready!
==> default: Checking for guest additions in VM...
 default: No guest additions were detected on the base box for this VM! Guest
 default: additions are required for forwarded ports, shared folders, host only
 default: networking, and more. If SSH fails on this machine, please install
 default: the guest additions and repackage the box to continue.
 default:
 default: This is not an error message; everything may continue to work properly,
 default: in which case you may ignore this message.
==> default: Configuring and enabling network interfaces...
Vagrant コマンド類
仮想環境を止める
>vagrant destroy
仮想環境のboxを削除
>vagrant box remove
仮想環境が今何あるか?
>vagrant box list
ptomulik/freebsd-9.1-amd64 (virtualbox, 1.2.0)
SSHで入る
>vagrant ssh
SSHのPrivateKeyのあり場所を探す
>vagrant ssh-config
Host default
 HostName 127.0.0.1
 User vagrant
 Port 2222
 UserKnownHostsFile /dev/null
 StrictHostKeyChecking no
 PasswordAuthentication no
 IdentityFile C:/Users/tom2r/vagrant/freebsd9/.vagrant/machines/default/virtualbox/private_key
 IdentitiesOnly yes
 LogLevel FATAL
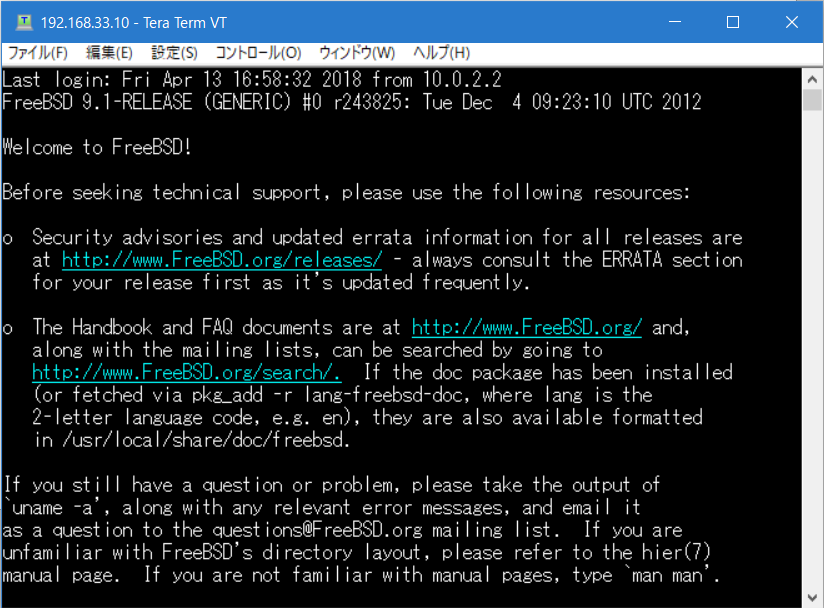
とりあえず。。TeraTermで接続して入ってみる

で・・・最初 どうやっていれるんだったっけ?FreeBSDって(笑)
pkg ports らしい。。 pip とか apt-get とかやってたのでどうするんだったか??
Apatchなんかもう数えられないくらい入れたんだけどなぁ(笑)
参考文献


コメントを残していただけるとありがたいです