目次
Windowsで、ドローンシミュレータを動かす
Arudpilotを試しに動かすのに、The SITL (Software In The Loop) というシミュレータがあります。ハードウェアを用意せずに、まずシミュレータ上で動かしてみることができるそうです。元記事は、こちら・・・
Arudpilot系は、Ubuntu系で動くようにできているのでUbuntu入れるところからやってもいいのですが、そこは素直に、Windows 10 /7でまずは入れることとしてみました。
ちなみに、Windowsに仮想化して乗っけるという手もあります。(Ubuntuマシンとか、Linux系はいろいろあるので、また中古のPCでも手に入ったらやってみようかと・・・)
ここでは、Windows上でSITLを構築し、MAVProxyとMissionPlannerを用いてシミュレーションする方法についてφ(..)メモメモしておきます。 って言っても、Cygwinのインストールがメインですけどね。
MAVProxyのインストール
MAVProxyは、ArduPilotの開発・テストに使用されるソフトで、最小限のコンソールベースのGCS(グランドコントロールシステム?)です。
- Download MAVProxy for Windows (最新版)
- ライセンスを許諾して、デフォルトセッティングでEXEをインストールする。
古いバージョンは、こちらに http://firmware.ardupilot.org/Tools/MAVProxy/.
Cygwin
まぁ、こっちがメインですけど・・・CygwinはWindowsでArduPilotをリビルトするためのライブラリーやツールとしていれます。
Cygwinインストール
- Download and run the Cygwin 32-bit installer.
32bit版の方がprocpsのライブラリの関係で、いいとか・・ まずは素直に32bit版を入れます
インストーラーを動かすと、Select Packagesという画面が途中で出てきます。その時に以下のパッケージを探して、Skip→Ver.No にします。

Select the packages listed below (search using the text in the “Name” field):
| Name | Category / Name / Description |
|---|---|
| autoconf | Devel | autoconf: Wrapper scripts for autoconf commands |
| automake | Devel | automake: Wrapper scripts for automake and aclocal |
| ccache | Devel | ccache: A C compiler cache for improving recompilation |
| g++ | Devel | gcc-g++ GNU Compiler Collection (C++) |
| git | Devel | git: Distributed version control system |
| libtool | Devel | libtool: Generic library support script |
| make | Devel | make: The GNU version of the ‘make’ utility |
| gawk | Interpreters | gawk: GNU awk, a pattern scanning and processing language |
| libexpat | Libs | libexpat-devel: Expat XML parser library (development files) |
| libxml2-devel | Libs | libxml2-devel: Gnome XML library (development) |
| libxslt-devel | Libs | libxslt-devel: XML template library (development files) |
| python-devel | Python | python-devel: Ptyhon language interpreter |
| procps | System | procps: System and process monitoring utilities (required for pkill) |
たぶん、すんなりと、インストールできます。
Cygwin設定
1.設定ファイルを作るために、Cygwinを動かして、Exitで終了する。
C:\cygwin\home\user_name\. に、設定ファイルができているのを確認
2..bashrcの編集
C:\cygwin\home\user_name\.bashrc. を編集して 最後の行に、
export PATH=$PATH:$HOME/ardupilot/Tools/autotest
を追加します。
Python packagesのインストール
python -m ensurepip --user
python -m pip install --user future
python -m pip install --user lxml
をインストール
※1 変なエラーが出たら、このあたりを参考に
 Retrying (Retry(total=4, connect=None, read=None, redirect=None)) after connec tion broken by 'NewConnectionError('<pip._vendor.requests.packages.urllib3.conne ction.VerifiedHTTPSConnection object at 0xff8c712c>: Failed to establish a new c onnection: [Errno 114] Network is unreachable',)': /simple/future/
 Retrying (Retry(total=3, connect=None, read=None, redirect=None)) after connec tion broken by 'NewConnectionError('<pip._vendor.requests.packages.urllib3.conne ction.VerifiedHTTPSConnection object at 0xff8c732c>: Failed to establish a new c onnection: [Errno 114] Network is unreachable',)': /simple/future/
 Retrying (Retry(total=2, connect=None, read=None, redirect=None)) after connec tion broken by 'NewConnectionError('<pip._vendor.requests.packages.urllib3.conne ction.VerifiedHTTPSConnection object at 0xff8c740c>: Failed to establish a new c onnection: [Errno 114] Network is unreachable',)': /simple/future/
 Retrying (Retry(total=1, connect=None, read=None, redirect=None)) after connec tion broken by 'NewConnectionError('<pip._vendor.requests.packages.urllib3.conne ction.VerifiedHTTPSConnection object at 0xff8c74ec>: Failed to establish a new c onnection: [Errno 114] Network is unreachable',)': /simple/future/
 Retrying (Retry(total=0, connect=None, read=None, redirect=None)) after connec tion broken by 'NewConnectionError('<pip._vendor.requests.packages.urllib3.conne ction.VerifiedHTTPSConnection object at 0xff8c770c>: Failed to establish a new c onnection: [Errno 114] Network is unreachable',)': /simple/future/
 Could not find a version that satisfies the requirement future (from versions: )
No matching distribution found for future
みたいなのが出てきた時は・・・
~/pip/pip.ini に下記を記述する。(Linuxの場合は、~/pip/pip.conf)
[global]
proxy = [user:passwd@]proxy.server:port
Proxy の指定を pip でできるので・・・
認証なしの場合
python -m pip install --user future --proxy=http://proxy.example.co.jp:port
認証付の場合
python -m pip install --user lxml --proxy=http://proxy.example.co.jp:port
とすればProxyの問題は解決します。
ArduPilotのダウンロードとmake
Cygwin Terminal を開いて Github ArduPilot repositoryのクローンを作る
git clone git://github.com/ArduPilot/ardupilot.git
cd ardupilot
git submodule init
git submodule update
クローン作るだけで、結構時間がかかります。コーヒーでも入れて、煙草をすって・・・休憩しましょう(笑)
ちなみに、ここでもProxyでひっかかる場合は・・
git config --global http.proxy http:/proxy.example.co.jp:port
のおまじないが必要ですね(笑)
ArduCopter ディレクトリに行き makeする
cd ~/ardupilot/ArduCopter
make sitl -j4
SITL(シミュレータ)をmakeするってことですね。
ArduPlaneのディレクトリに行ってmakeすると飛行機
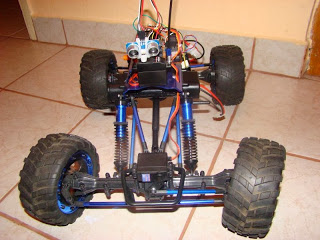
ArduRoverのディレクトリだと、車ですね。ってArduRoverってない(笑) APMrover2 みたいです(笑)
またPlaneの場合は、JSBsimを入れないといけないようです。JSBsimは、フライトシミュレータで、飛行機の動特性をシミュレートするもののようです。ホームディレクトリに一回もどって
git clone git://github.com/tridge/jsbsim.git
cd jsbsim
./autogen.sh
make        ← ※2参照
cp src/JSBSim.exe /usr/local/bin
と作ってから
cd ~/ardupilot/ArduPlane
sim_vehicle.py -j4 --map
とするようです。
ここで・・・JSBsimのmakeで引っかかりました(笑) -lexpatがないのでld出来ませんと・・・ libexpatがないということを言ってる(笑)。。やっぱ最初からUbuntuにしておけばよかったと思いつつ・・・Cygwinをいじってみます(笑)
Cygwinでapt-getのようなのを入れておいた方がいいことに気づく。。(笑)
apt-cygっていうコマンドを入れるには、また、Setup Cygwin 32-bit installerを動かして、SelectPackagesで
- Base/gawk
- Archive/bzip2
- Base/tar
- Net/wget
wgetで取得しておいて
$wget https://raw.githubusercontent.com/transcode-open/apt-cyg/master/apt-cygとして、apt-cygを入れる。
chmod 755 apt-cyg
mv apt-cyg /usr/local/bin/
それから
apt-cyg install libexpat-develとして・・・もう一度 ※2に戻る(笑)
とりあえず・・・今日はここまで(笑) 次は・・・
FlightGear 3D View (Optional)
3DViewを追加する場合は、これを入れるそうです。
オプション入れるかなぁ??(笑)

コメントを残していただけるとありがたいです